Wednesday, July 27, 2011

At Last - We're Making Progress!!

So it's now been two weeks since we got the 45-gallon steel barrel in the bathroom basement re-sunk an extra 16"-18" deeper into the ground and we've got the sump pump working properly.  We've got the surplus clay that we've been digging out of the sump hole and the trenches carted outside and about 3/4 of the excavation for the drain tile dug out.

We've got the ABS rigid plastic-pipe materials to start the discharge lines for the baggage room basement on hand - we only have to start gluing the bits-and-pieces together.  I've got a 45-gallon steel barrel on hand for the baggage-room basement sump pit which I'm going to take the oxy-acetylene torch to on Saturday to get the bottom lid and the two holes in the side for the drain tile cut out. 

There's still a lot more work to do but we're making good progress in the bathroom basement.  Already the clay is starting to dry out and things aren't as muddy and gooey as what they first were.

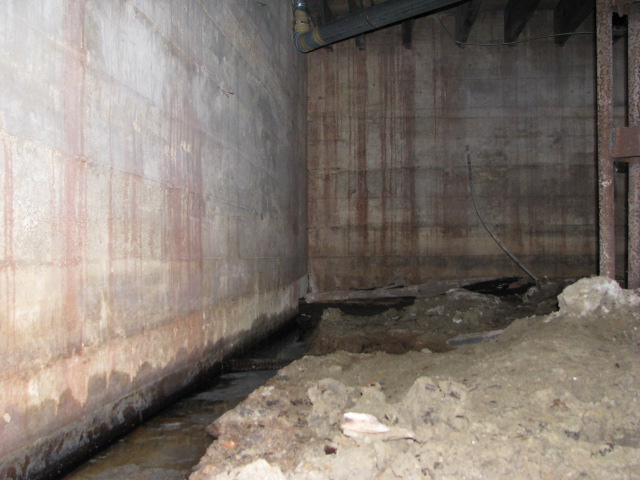
This has all been done one shovelful of clay at a time.  One bucket at a time.  Hauled through the basements and dumped outside.  Slowly but surely the work has progressed to the extent that the bathroom basement is starting to dry up.  If we can only keep the work moving along like this, we'll start to see some definite progress.

It's the old story - how do you eat an elephant?
One bite at a time.
How do you drain the swamp?
One shovelful of clay at a time.
One bucketful of clay at a time.

The lads have been very good at eating the elephant - one bite at a time.  It isn't glamourous work - far from it.  It's grunt work. It's dirty, muddy, sweaty work - especially in this hot humid weather that we've been having these last couple of weeks. 

How important is this work, you ask?  All you have to do is look at the hardwood flooring in the main waiting room.  Hard to believe that the flooring was laid down only 20 years ago.  The individual boards are starting to curl up and separate from their next door neighbour.  This is a clear sign that the dampness in the basement has been affecting the structure of the hardwood flooring.

If this keeps up for another 5-10 years, the dry-rot will start to set in.  If we can keep the basement drained and reduce the moisture, we can postpone that decay for another 10-15 years.  If we can install a couple more sump pumps - one in the baggage room basement and another in the gift shop basement, we can reduce the moisture substantially.

Now, if we had the time, the manpower, and the financial resources, we could add 6" of clear 1" septic bed crushed stone, cap it with 6" of concrete and we'd have an environment akin to what you have in the basement in your house.  Not exactly perfect but the best that can be done under the circumstances and with the limited amount of money that's available.
There are only four constraints to achieving this goal - time, manpower to do the grunt work, money, and the Board's enthusiasm for the job, .  I've got no problems with the first three - time, manpower and money.  I'm  retired so I've got the time to oversee and give guidance to the project.  We've now got a bunch of hard-working conscientious young lads who have done a good job in digging out the clay and moving it out of the basement.  A couple of folks have stepped up to the plate and have committed or have spent the money where needed (so far our costs have been less than $200).

But I do have some reservations about the Board's enthusiasm.  That's always been a problem. So, if you get the chance, please do two things for me (and for you and for the Museum).  Tell the powers-that-be that this is a very important project.  And those young lads are really doing a good job.  Without those lads and the financial support of a couple of key people, we wouldn't be making the progress that we've made.  Keep up the good work, gang!

We made a huge amount of progress this Thursday.  We're about 3/4 done digging the trench around the perimeter of the bathroom basement.  Next week should see the trench completed and the excess clay moved out of the bathroom basement so that we can lay in the "Big-O" drain tile and bring in some 1" "clear" septic bed crushed stone.  I got a couple of high-wattage power-saving light bulbs so that we can now see what we've been doing in the bathroom basement.  I'm going to get a couple of high-wattage power-saving light bulbs for the baggage-room basement so that things will start looking a bit brighter.

There's one thing I especially want you to notice in all of these photos.  Those wet spots on those T-shirts?  That's honest-to-goodness sweat.  That's a sign of good hard work.  Everyone involved with this project deserves a big pat-on-the-back and lotsa credit for what's being done.  Make sure you thank them all next time you see them.   

See y'all again next week when we can say "Hello Houston.  The "Big O" has landed!"

Friday, July 22, 2011

The Slugging Work Continues - It's Not Hot. It's Damn Hot!!

The lads have been steadily working away in the bathroom basement hauling out the excavated clay that's laden with water which adds an extra 50% to the weight of the bucket.  Jam the shovel into the pile of clay.  Pull it out with a shovelful of the sticky stuff.  Dump it in the plastic bucket.  Jam the shovel into the pile of clay.  Pull out another shovelful of the sticky stuff.  Dump it in the plastic bucket.  Bucket full.  Lift it over to the opening in the foundation.  Pass it through to the person in the baggage room basement.  Pick up another empty bucket.  Jam the shovel into the pile of clay........  

The guy in the baggage room basement then hauls two buckets over to the opening in the foundation into the waiting room basement, shoves the buckets through the opening, crawls through himself, lugs the two buckets over to the opening in the foundation into the furnace room basement and passes them through to the guy waiting in the furnace room basement.  Pick up two empty pails, back through the opening into the baggage room basement, shove the two pails through the opening into the bathroom basement where two more full pails are awaiting him. 

The guy in the furnace room basement lugs the two pales up the stairs, out onto the boardwalk, steps down across the tracks, over to the edge of the swamp, dumps the pails, back down the stairs, shoves the two pails back into the opening into the waiting room basement where two more full pails are awaiting him. 

Shovelfuls of clay into the pails, pails lugged through the basements, up the stairs, outside, dumped, back downstairs, empty pails through the basements.

And so on, and so on, and so on.  Not exactly glamourous work but it has to be done.

Monday and Thursday were particularly difficult days as the temperature soared into the mid 30s with a humidex in the mid 40s.  The most the lads could work was about 10-15 minutes at a time but then they had to take a 15 minute break.  It was particularly hot and humid in the basements even with the big fan sucking the air out in the furnace room basement.  By noon hour on Thursday, my T-shirt was soaking wet.

However, we made really good progress.  All of the extra clay in the bathroom basement was hauled out and we managed to get about 6' of trenching dug from both sides of the 45-gallon steel barrel sump pit.  We've all developed a routine on digging the trench, filling the pails, lugging them outside, dumping the spoil......  so much so that the lads do a pretty good job on their own on Mondays when I'm not there.

So, next time you see them, make sure you tell them they're doing a really good job.  I know they'll appreciate it.


Just to remind you, here's the plan for doing the bathroom basement.  The sump pit and sump pump have been installed and are working as they should.  The water table is slowly being lowered in the bathroom basement.  It's also noticeable in the baggage room basement.  What was once soggy clay is now starting to firm up. 
We now have to dig the trenches all around the inside perimeter of the bathroom basement.  And that's going to be another messy job.  The trenching will be about 16"-18" deep and a bit wider than the width of a shovel.
 However, it's like eating an elephant.  "How do you eat an elephant?" you ask.  "One bit at a time."  How do you install drain tile in the basement.  One shovelful of clay at a time.  

Some Interesting Goodies Down At Bedell
As the Supertramp song says, I always take the long way home - this time through Merrickville and down to Bedell.  Bedell used to be the junction with the first railway line built in Eastern Ontario - the Bytown & Prescott built in 1854.  As you can see from the photo, it used to be quite the place (the loco is coming up from Ottawa and is about to cross the double-tracked Winchester sub). 

It still is one of the best places to watch the trains.  Only this time, I discovered some nice 80lb rail with all of the track jewelery neatly piled - about 35 pieces of rail manufactured in 1907 - just the right stuff for the railway museum - if somebody wants to give somebody at CP Rail a call.  Also, some half-decent ties. 

Not bad, eh!?

... but we've still got lots more work to do!

Monday, July 18, 2011

The Bathroom Basement - Sinking The Sump Pump

There was one thing that was obvious to me that Thursday back in April when I went into the bathroom basement - the whole basement was full of water.  Duh! Was that an intelligent observation, eh!?

The sump pump wasn't working and the steel barrel was too far out of the hole which meant that we couldn't lower the water table down far enough to keep the moisture at a minimum.  And it hadn't been sunk down into the mud properly which was the first problem that had to be solved.  You can see that the steel barrel  needs to be lowered at least another 12". 

Plus there were piles of mud and clay that were still piled up all over the place from when we had last dug the sump pit and the ditches for the drain tile.  Here's a photo that outlines the water level in the bathroom basement. 

The second problem was to see why the sump pump wasn't working.  Was it a float that was stuck?  Was the pump clogged up with mud?  Or had the motor burned out?

All of the sump pumps were submersibles which meant that the motor can't ever be drowned.  I've had a couple of situations with "upright" sump pumps where the motor perches on the top of the propeller shaft.  Only problem is that the floats stick, the water rises and drowns the motor.  Don't ever plug in a drowned sump pump!!  Usually the problem with a submersible sump pump is either the motor has burned out or the floats are stuck.

So on Thursday, June 30th, with two young volunteers, Corey and Mike, we started the process of dewatering the bathroom basement.

The first step was to get rid of the water.  Since the sump pump wasn't working, I had to find another sump pump.  Fortunately, Bill M happened to have his portable sump pump and hose with him so we managed to get that into the sump pit after removing the broken sump pump.  After 15 minutes of pumping, we had the water down to a more manageable level. Next Mike and I dug out the 45-gallon steel barrel with Corey trucking the plastic pails of clay to the outside and dumping them into the outer swamp.  In about 20 minutes we had the steel barrel removed and out of the way.

I then stepped into the hole and started to dig.  As I shuffled my feet around in the narrow hole, the water soon turned the clay into a soup.  Using a combination of digging with the shovel and shuffling my feet around, I managed to dig the hole another 2 feet deeper.  Only problem was that the hole was full of this sloppy muddy mess.  Corey rescued some Tim Horton's coffee cups and I scooped up this thick soup, complete with rocks, into the plastic pails which Mike dumped into the baggage room basement next door.

In between, I carted the sump pump outside where Bill M took a look at it to see if the motor was seized.  With a pail of water, he plugged the pump in, raised the floats, and a jet of water shot out of the exhaust port.  A closer look at the pump revealed that the plastic clip had broken off which stopped the floats from shutting off.  The fix for that would have to wait another week as the necessary parts were back home.

With the hole now cleaned out to a depth of 4', we set two concrete blocks into the bottom of the hole as a base for the sump pump and placed the steel barrel liner on top of the concrete blocks.  By this time, John W had brought down half a tractor bucket of that 1" clear septic-bed crushed stone from the north end.  Corey and Mike then started to bring the stone in using the plastic pails.  As Mike lifted each pail of stone through the opening, I dumped the stone around the sides of the barrel until we had the hole back-filled with the stone.

As the two photos below show, the barrel was now at least 12" - 16" lower in the ground than what they were before.  Now we could start to lower the water table and start to dry out the clay.  Quite a difference from the two photos above, eh!? 


By this time it was 2pm and time for me to leave so we have to leave fixing the sump pump to next week.

Thursday, July 14, 2011

All In A Day's Work

To give you an idea of how we get the clay out of the basement, here's a bit of a photo essay on today's happenings.

Here's Mike and Jesse in the bathroom basement on the end of a "5-foot boom".  They'll fill up those two pails with two shovelfuls of clay.  You can see all the pipe work that's in the way. 

They then carry the pails over to the hole in the wall and throw them through the opening.  Here's Brad lifting a couple of pails through the hole in the wall to Adam and Jesse in the baggage room basement.  Usually there's only one person in the baggage room basement as the other person is in the main waiting room basement.

This other person carries the two pails over to the hole in the wall in the furnace room basement.  Here's Mike in the main waiting room basement sticking his head into the baggage room basement on his return trip with empty pails. 

The person in the baggage room basement then carries the pails over to the opening in the furnace room basement and passes them through the opening.  The person in the furnace room basement then carries the two pails up the stairs, along the platform, across the tracks where he dumps the clay along the edge.  The empty pails then make the return trip back into the bathroom basement where the whole process is repeated again.

Here's a photo of the young lads who were helping us on this project today - shovels appropriately crossed.

And here's a photo of the whole ugly group of us at the end of the morning.  Quite an ugly mess, eh!?  That clay we're standing on was 18" higher two hours before. 

We start all over again next week.

Wednesday, July 13, 2011

"Draining The Swamp - The Report

I was at the Science & Tech Museum one Saturday a few months ago where I usually am most Saturdays with the Dirty Hands Club of the Bytown Railway Society.  BRS has a number of pieces of railway rolling stock that we DHC members work on most Wednesday and Saturday mornings.  It's been a good experience for me as there are a number of guys (I call them my "maestros" or "Jedi Masters") who have shown me how to operate the various pieces of machine shop machinery and where I've been able to upgrade my tool and equipment skills.

Ross mentioned to me about a report on dewatering the basement.  As I previously mentioned, my experience with playing in the water goes back to when I was around 8 years old.  In addition to digging ditches with bulldozers, scrapers, graders, Grade-alls, and other big boy toys.  I've laid sewer pipe, water pipe, hydro pipe (they're called high-tension wires), in addition to smoking a pipe once upon a time.

If you travel down Greenbank Road, you'd never know there was a 6" water pipe on the east side of the road between Hunt Club and Fallowfield Roads.  That got installed the summer of 1967.  As you go south on Greenbank after Hunt Club, you go over a large "overpass".  That's where I first experienced leda clay in digging the hole for that super-sized galvanized steel culvert.  That was a really good summer for me as I got to play with some 75% Forcite - 400 pounds of it going "KABOOM!!!" all at once, blasted rock flying all over the place and bouncing off the trees!!  Almost wiped out a car with a rock the size of a small Ford Focus.  Which is why I still like to hover around a construction site where the heavy equipment is whenever I get the chance.

But I digress...............   (Wow, have I ever digressed!!!)  Back to the topic at hand.  Draining the swamp.


I took a look at the report and decided that I would do my own report.  So one Thursday I went down into the basement, took a look around, took some photos, did some pondering and came up with a plan.  I then took all of this information and put it into a report which I called "Draining the Swamp - Dewatering The Basement at the Canadian Northern Railway (CNoR) Smiths Falls Station". 

If you want an autographed copy of the report, let me know, eh!  (Okay guys, that's a joke, eh!!)

That was back in April.  Shortly afterwards, George Ward, Ross Robinson and I huddled.  If the recommendations in my report were to be implemented, I was going to need some help.  I'm not so full of piss-n-vinegar as I was 22 years ago and hauling pails of heavy clay through basement walls and up-and-down stairs is not exactly my idea of fun and exercise.  I was prepared to make it happen but I was going need some help.  George said he would arrange to get some help and Ross said he would stick-handle it through the bureaucracy.

And that's where things stood until last June 30th.

Monday, July 11, 2011

The Last Frontier - The Bathroom Basement

The key to any dewatering project is not to stop the water from flowing in.  No amount of water-proofing will keep the water out.  The cost would be too prohibitive, particularly with a foundation such as the station.  Water will find the smallest crack and will flow in.  The key to keeping a basement dry is to pump the water out.

Here's a "before-and-after" diagram that shows how some drain tile in a trench that is backfilled with washed 1" septic-bed crushed stone.  Technically it's called "clear" crushed stone because it's been "washed" once and contains a minimum amount of "fines" - aka "stone dust".  It's the stone dust that clogs up the septic bed system so building code requires that it be washed TWICE so that it contains no fines.  And since the maximum-minimum size of stone is 3/4"-1", it's called 1" clear septic-bed crushed stone.  So, when ordering crushed stone for drainage or septic bed systems (also for ballast at the Museum) the key buzz-words are "clear" and "septic-bed".


So we have to somehow collect the water and pump it out.  This is done two ways.  We dig a deep sump pit and we install drain tile that drains the water into the sump pit.  If we dig the sump pit deep enough, we can lower the water table within the basement so that the basement will stay relatively dry all year round.

And that's exactly what we tried to do.  We succeeded somewhat with the waiting room basement and a bit with the baggage room basement.  But the washroom basement was far from being a success.

Trying to dig a round hole 4' in diameter and 4' deep in soggy soupy mud is a bit of a challenge.  You've got water seeping into the hole as you dig down.  With your feet planted in the bottom of the hole trying to dig out a shovelful of muck, the water and clay turn into a soupy mess.  As you dig deeper and deeper, the hole gets narrower and narrower.  More water keeps seeping in which gets mixed up with the soupy clay already in the hole.  As you try to shuffle around, the mud splashes up on your boots, on your pants, on your shirt, and if you've got your face lowered looking into where you're digging, onto your face.  You come out of the hole looking as if you've been in a mud-wrestling contest.  

The only way to get the soupy mud out of the hole is to scoop it out with a small kid-size plastic pail and scoop it into a bigger plastic pail.  The plastic pail gets full so you have to hike yourself out of the hole, dump the pail and "jump" back into the hole.  Only when you do, you end up getting soaked with more soupy mud.  As you dig deeper it becomes next to impossible to get out of the hole.  All the time you're working in the dark.  And if you're in that basement room all by yourself, there's nobody around to help you out of the hole. 

So, the sump pit in the washroom basement didn't get dug as deep as it should have.  Add to that the fact that the sump pump wouldn't work properly for various reasons.

Here's a a couple of photos of what the water level looked like about 3 months ago. I've added the "bathtub ring" to show you what the water level was like - almost up to the top of the clay - which meant that the basement was permanently damp.   


The photo below shows what the water levels were like after we plugged in the pump and let it run for 15 minutes. 

In the meantime, other priorities and things took me away from the project and that's where things have stood for the last 7 years - until a couple of months ago.  I hate leaving a challenge unfinished - even if it was one that I started 22 years ago.  And so I "volunteered" to take on the project.

So where do we start!!??

The obvious place to start was in the bathroom basement lowering the 45-gallon drum steel liner as this would result in the fastest and most immediate benefit.  And besides, it would be the "easiest" of the projects to do.  

Or so I thought as we take a closer look in our next post.


Sunday, July 10, 2011

"Draining The Swamp" - The Project Begins

Way back when in the late 1980's, I'd to go out to the Museum on a Sunday morning around 6 am with my lawn mower to cut the grass (not much grass but lotsa weeds) and leave in time to get back home for noon hour.  One Sunday morning around 1988, there's two guys in the basement.  One was Peter Lang and the other was this colourful character by the name of Ross Robinson.  They were sloshing around in the water in the basement underneath the main waiting room.  Water was pouring in through the large sewer pipe hole (lucky it was only water and not sewage, eh!?).  So wearing my rubber boots, I asked what they would like me to do.  "Get rid of the water!" was the gruff reply from Ross while trying to stop the flow of water pouring in through the hole in the wall.

Now the photo below shows that all is cool and calm with hardly a puddle of water.  That's because this photo was taken about a week ago.  However, 22 years ago, things were quite different.  The water level was at least 16" above that plastic ABS pipe that you see sticking out of the wall.  So you can see we were facing a big challenge.

Now, my experience with water, floods, dams and sump pumps started when I was about 8 years old.  Back then my brother and I would dam up the ditches alongside the road so that we could get enough water to float our boats.  My parents built their own house when I was 14 and I helped install the septic bed, the septic tank, the sump pit, and the drain tile.  In the summer my brother and I would build a dam across the Jock River so that we could swim in the heat of the summer.  During my days at university I worked on road construction building ditches, installing sewer pipes, water lines, and manholes, all the time keeping the water at bay and generally mucking around in the mud.  But I digress........  Back to the matter at hand. 

Back then there were some 45-gallon drums floating around in the back-40 - the ideal instant-liner for a pit for a sump pump.  Using my hammer and a steel chisel, I knocked the ends out of that first drum.  Next I started to dig a hole for a sump pit using the steel drum as a liner.  With the steel drum and sump pump installed, I started to dig the trenches to put in some drain tile.  Here's a photo of that first sump pit installation taken two months ago.  Hard to believe it's over 22 years old and still doing its job, eh!? 
 
With the trenches being dug, we needed to install some drain tile.  I can still remember telling Ken Papineau one Sunday that I needed some 6" "Big-O" plastic pipe.  "What in the heck is 'Big-O" plastic pipe?", Ken asked.  (Obviously Ken had never been a farmer, eh!?)  Ken thought I was talking Greek but when I arrived the next Sunday, there was a big roll of the stuff down in the basement.

Slowly the system of trenches was extended in the main waiting room basement, Big-O drain pipe installed and all covered with crushed stone.  Slowly the dirt floor began to dry out.  Now if I hadn't told you, would you have known there's a whole system of drain tile underneath the basement floor!?  However, much more work needed to be done in order to do a satisfactory job of keeping the water at bay.

Next on the lineup was some trenching in the baggage room basement after knocking a hole through the 16" concrete wall between the main waiting room basement.  Hard to believe that there's some Big-O drain tile underneath all that clay, eh!?

As I got ready to start working on another basement section, I would tell Ross I needed some lights.  Fumbling around in the dark, Ross would manage to install lights so that we wouldn't be working in the dark.  When I returned the next Sunday, there were the lights and some light switches. 

However, with a thousand-and-one priorities to do around the Museum, the drain-tile project began to take a back seat to everything else.  From time-to-time I would wander down into the basement and add to the system of trenches and canals.  In 2004, I started to trench along the inside of the foundations so that that the water seeping in from the outside could drain into the sump pits.  Slowly the piles of clay and muck started to pile up so that we couldn't dig the trenches any deeper without the excavated material rolling back into the trenchwork we had just dug. 

However, to do a better job, more sump pits and sump pumps had to be installed and the excess clay had to be trucked out of the basement.  And other priorities and things took me away from the project - until a couple of months ago.  I hate leaving a challenge unfinished - even if it was one that I started 22 years ago.  And so I "volunteered" to take on the project.

Next up:  Some basic principles of draining swamps.

A Bit Of Background About "The Swamp"

 "When you're up to your eyeballs in alligators, there's a tendency to forget that the original objective was to drain the swamp.  
Solution - Get rid of the alligators.
Then drain the swamp"
Anon

So we've got to drain the swamp.  How are we gonna do it?

In order to understand how we're gonna try and "drain the swamp", it might help to take a look at how "the swamp" was created.

The Canadian Northern station was built back in 1910 - over 90 years ago right on the edge of town.  No William St, no Quattrocchi's, no Rideau Lumber, no through traffic.  Just a swamp.  From the photo below, you can see what that swamp looked like.  You can even see the bullrushes.

You can see that the station was built right on top of the swamp!  Right on top of a heavy bed of clay that doesn't let the water seep away.  The foundation is completely out of the ground.  If they're going to use the station, they're going to need a lot of fill.  

The CNoR brought in loads and loads of fill.  Some of it was blasted rock from the north end of their railway line where it went underneath the Canadian Pacific Railway.  Some of it came from gravel pits south of Delta on the Brockville, Westport & Northwestern Railway which the CNoR had just bought back in 1910.  The photo below gives you a good idea of how much fill was brought in.  Don't you just love how that water is lying in the swamp!?

All of this blasted rock and pit-run gravel was very porous.  Water could easily seep through this fill and into the basement of the station. 

In addition to the station being built on a swamp, the swamp sloped from east-to-west so that heavy rains and the spring run-off would seep down to the clay and into the basement.  Depending on the season, the water level in the swamp can be higher than the bottom of the basement so that water flows into the basement.  When the water level in the swamp is below the bottom of the basement sub-floor - usually towards the end of August - the basement starts to dry out.  Even then, there's a substantial water-seepage underneath the footings and into the clay sub-floor all year-round with the result that the basement is extremely damp. 

Over the years, this continual dampness in the basement rotted out the floor joists.  Add to this the freezing, and thawing of the water in an unheated basement and you have some interesting results.  As the water froze, the concrete columns supporting the steel beams would be thrust up into the air, destroying the wooden floors.

When the Museum took over the station in the early 1980's, the floors had collapsed. 

Ultimately the Museum rebuilt the floors in the late 1980s and attempts were made to drain the water out of the basement. 

Quite a difference, eh!?

So how did we manage to keep the water out of the basement?

We'll take a look at that in our next post.